How to build a rental friendly, walk in closet on a budget with IKEA PAX
I built a walk-in closet room by myself using IKEA Pax (and you can to)! Learn from my mistakes using this step by guide on how to plan, build, and organize your dream closet in a way that won’t break the bank (or put holes in your wall).
Why IKEA?
My boyfriend and I recently sold our 1 bedroom Miami condo and moved into a 2 bedroom rental. One of the main reasons for the upgrade was a need for additional closet space since housing all of our clothes/shoes/accessories in 1 closet was becoming a loosing game of Tetris.
In the new condo, the master bedroom closet became “his closet” and we decided to build out bedroom #2 as “her closet”.
There are so many closet options out there from $20 rolling racks to full on custom built-ins. I went with IKEA Pax to achieve a built-in look but with the ability to install and remove without damaging our rental condo.
Quick Facts
Total Cost: $2,056
Time to Ship: 8 Weeks
Time to Build: 2 days
Difficulty: Very easy
Level of Hapieness with the Final Product: Thrilled.
What is IKEA Pax?
IKEA sells freestanding wardrobe frames in 2 heights, 3 widths, and 2 depths. You can mix and match them depending on the size of your space. You also have the option to add hinged or sliding doors and customizable interiors – drawers, shelves, accessories trays, etc.
I purchased 5 frames: 3 large and 2 small, in varying heights and depths to fit my space.


Planning
- Measure your space! Consider ceiling height, baseboards, moldings, doors, electrical outlets, and other permanent wall fixtures like fire alarms and speakers. A beautiful closet is great, but not when it prevents you from being able to open the bathroom door all the way or access any of the room’s electrical outlets. I printed the floor plan of the room from our building’s website and scribbled measurements all over it. It was a helpful reference when using the online planner.
- Remember your ceiling height. The wardrobes come in 2 heights 7.6 feet & 6.5 feet. Make sure your ceiling height is a few inches taller than the wardrobe height. You don’t want to build a wardrobe on the floor and then be unable to stand it up because the ceiling is too low.
- Consider your height in deciding where to place clothing rods. You don’t want clothing rods you can’t reach. Grab a hanger and hold it up over your head like you’re hooking it to an overhead clothing rod. Measure the space from the top of the hanger to the floor – that’s the maximum height you should place a rod. I’m 5’5 and my tallest rods are about 6’8-6’9 off the ground. Leave at least 2 inches between the rod and the shelf above it to comfortably take hangers in and out.
- Measure your clothes. How much space do you need to hang your longest item? Put it on a hanger and measure it from the top of the hanger to the bottom of the item. You need about 41 inches for mini dresses, 51 for midi, and 61 for long.
- Use the online PAX planner. Click here to start designing. See below for screenshots of the original design for my closet. As you add and configure items, the planner tracks your total $$ so you now how much each design will cost.
- To door or not to door? I added doors to conceal my clothes and protect them from dust; however, the doors are the most expensive component. $800 of my total spend was on doors. So if you’re looking to save some cash or put your things on display boutique style, no doors is the way to go.
- ** if you choose doors, you will not be able to put a drawer at the bottom of the wardrobe due to the location of the door hinges. You can put a pull out tray or a wire bin. I added trays to the bottom of each wardrobe to store flip flops, sneakers, and other more worn shoes I didn’t want displayed on my shoe wall.
- Tailor interiors to your storage needs. As a major dress lover, I needed plenty of hanging space for mini and midi length dresses. I also needed handbag storage, so I included hanging bars in the 3 wide units and plenty of bag shelves in the 2 narrow ones.
- Waste no space. The tallest IKEA frames are over 7 feet. I’m 5’5, so a large space at the top is unreachable. Use this space to store infrequently used items. For the two tall wardrobes, I included a shelf 7 inches from the top to store shoe boxes that I don’t plan on grabbing until I need to move out of the apartment.
- Items may be out of stock. The IKEA planner does not tell you what’s out of stock until you go to check out. I intended to use all solid doors since they are half the price of the glass. However, the solid doors were unavailable in the shorter wardrobe height at the time I checked out. I was impatient and paid extra for the glass. The clothes rails were also out of stock but I decided to wait and order those at a later date. They were available the next week and actually arrived a month before the rest of the order. In hindsight, I should have waited to order the solid doors upon restocking as well.


Building
- Have the right tools. While the PAX system comes with all of the screws, nails, and bolts you need, it DOES NOT include a screwdriver or a hammer. Both are necessary. A drill would definitely be the best option and would cut assembly time significantly. Stubbornly, I used whatever we had laying around, which was a flathead screwdriver and the directions called for a phillip’s head. This made assembly more difficult and turned what should have been a 1 day process into 2.
- The instructions are easy to follow. It’s pictures only (no words). Start with the frames. Once you build one, you’ll get the hang of it and the others will be simple.
- 2 person job. The instructions are adamant that you need 2 people. Naturally, I tried to do it myself. I was shockingly pretty successful until I got to the doors, which definitely require 1 person to hold up the door while the other screws it in. I’d recommend 1 person build the frames while the other builds interior drawers. Do the doors together.
- Start bottom up when installing the interiors. This will give your hands room to screw in each interior compartment (drawers, shelves, trays, etc).
- Mark the location of the door hinges before installing interiors. You don’t want to add a drawer and then need to uninstall it to make room for door hinges.
- Hire help! If assembly seems daunting, you can hire task rabbit through IKEA to assemble it for you. I was quoted $400-600 to build these. Since I already went over budget on the doors, I decided to DIY and was very glad I did.
Rental Friendly
IKEA strongly recommends you screw the wardrobe units into the wall. This is for liability purposes as these units could tip over and harm someone if not properly reinforced. The instructions call for the removal of all baseboards in order for the units to be flush to the wall and then a screw through the back of the unit and into the drywall.
I cannot have missing baseboards and holes in my rental condo walls, so I ignored these instructions. Since this is a child and pet-free home, I was 100% comfortable with leaving them unattached. The units feel stable and I don’t anticipate any toppling over.
Organizing


Organize your closet in a way that’s easy to use and maintain. Here’s what works for me:
- Uniform hangers: I chose all white wood hangers from the Container Store. They match the wardrobes and give everything a clean, boutique feel. The wood is also thicker than a standard hanger, which limits the amount of clothes you can put on one rod and prevents that “bursting at the seams” look.
- Color & category coordination: I don’t like having to open every door/drawer in my closet to find the pieces for 1 outfit. Instead, I keep things organized by color and category to (a) make things easy to locate and (b) have a one stop shop for what I’m looking for. I have 1 drawer for jeans/shorts/t-shirts that all go together and a 2nd for workout bras/tops/bottoms. Dresses are divided by color among 3 rods: black/grey, blue/white, and colorful prints/greens/reds/pinks. Work separates are in the actual closet that came with the room.
- Clear plastic organizers: I placed small bags in clear organizers to fit more items on one shelf. The clear plastic also lets me see everything at once so I can easily locate the bag I’m looking for.
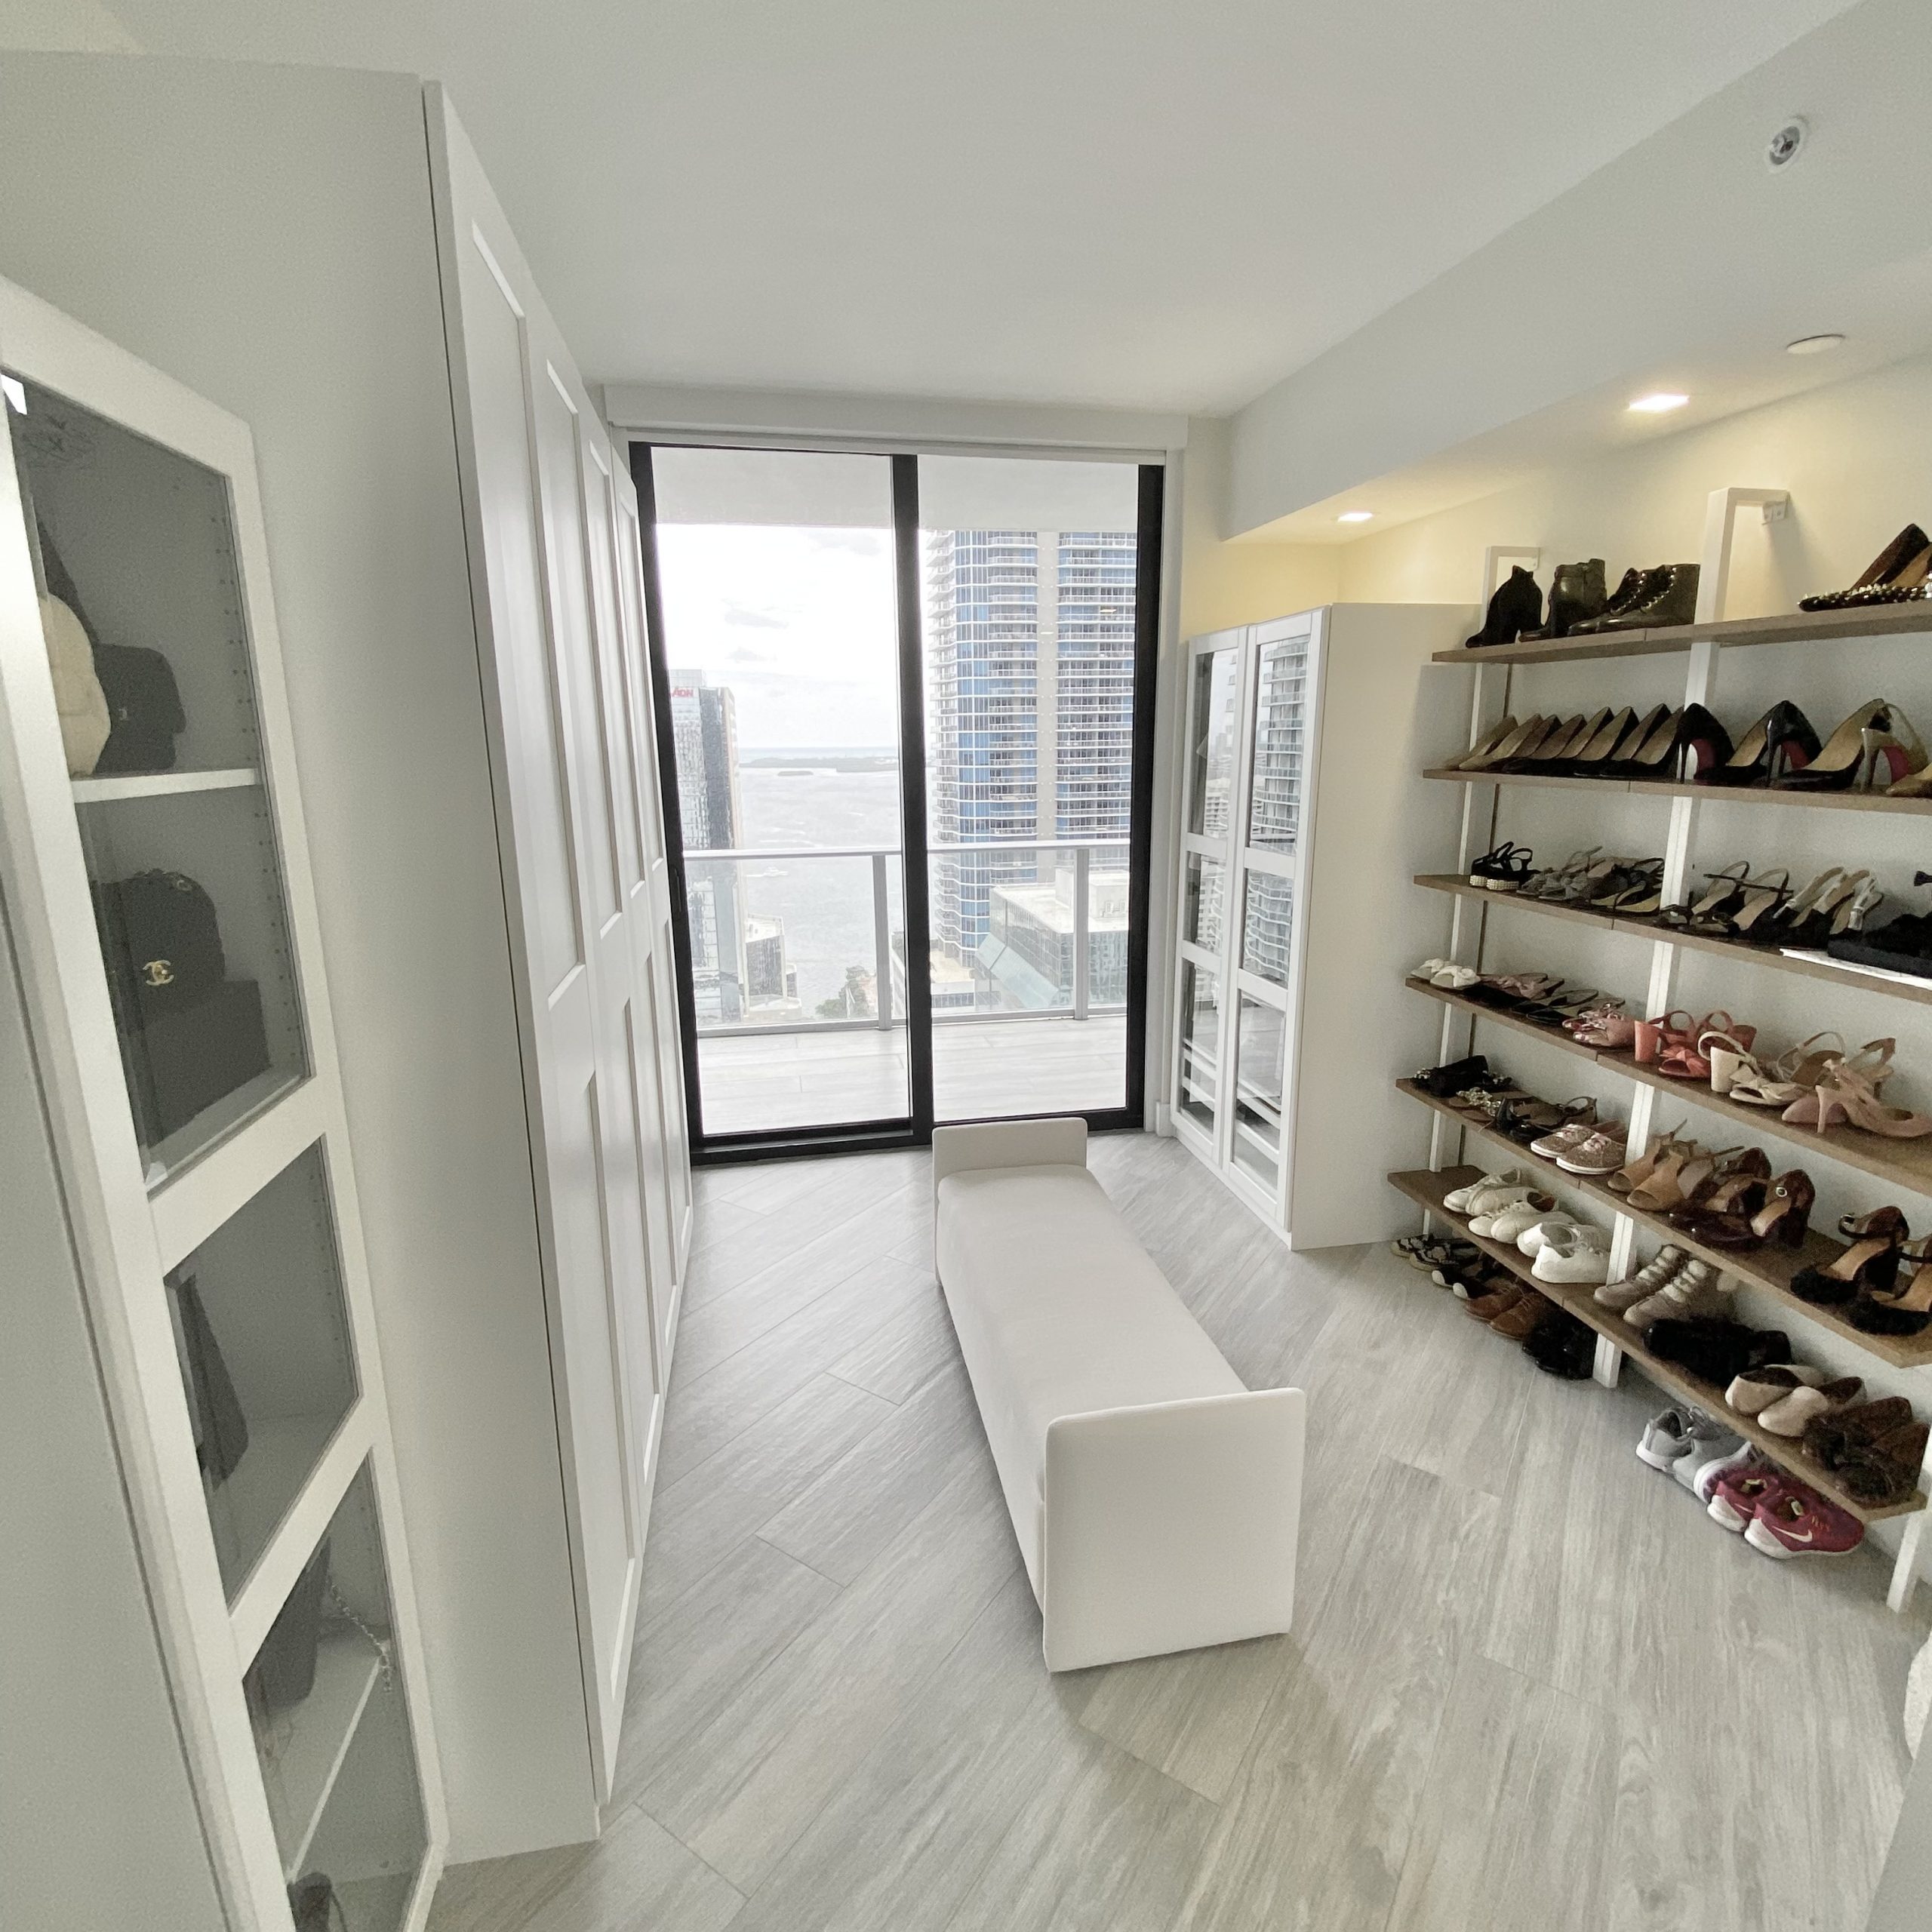
Shoe Wall

Why do people always hide shoes at the bottom of their closet? It’s dark, dusty, and not easily accessible. If you have nice shoes, let them be seen! Hence the shoe wall.
In lieu of a standard shoe organizer, I chose to go with a bookcase. They have more room between shelves so you can really see all of your shoes. 30” wide shelves will be able to accommodate about 4 pairs of ladies shoes.
First, I found a beautiful all white option at CB2 but the heights did not work with my space. I ended up going with 2 of this (much cheaper) 6-shelf dupe from Nathan James sold in several heights and colors by Amazon, Wayfair, and Home Depot. Installation did require drilling 4 small holes in the wall at the top of the bookcases, but they will be easy to fill before we vacate the apartment. We left a 30” space to the right of the shoe wall to add a floor mirror.
**If you own your home, the Container Store also has a really nice option where they will measure your space and build white floating shelves that make for a beautiful shoe wall.
Questions?
If you have any questions about planning, building, or organizing your closet, let me know in the comments below!

Leave A Comment